Mitered Granny Square: A Corner-Start Pattern With L-Shaped Stripes
A mitered granny square grows from one corner in turned rows, so its stripes form nested L shapes. Here is the row-by-row pattern with stitch counts and stripe ideas.
Tutorial at a glance
Materials
- Yarn needle
- Scissors
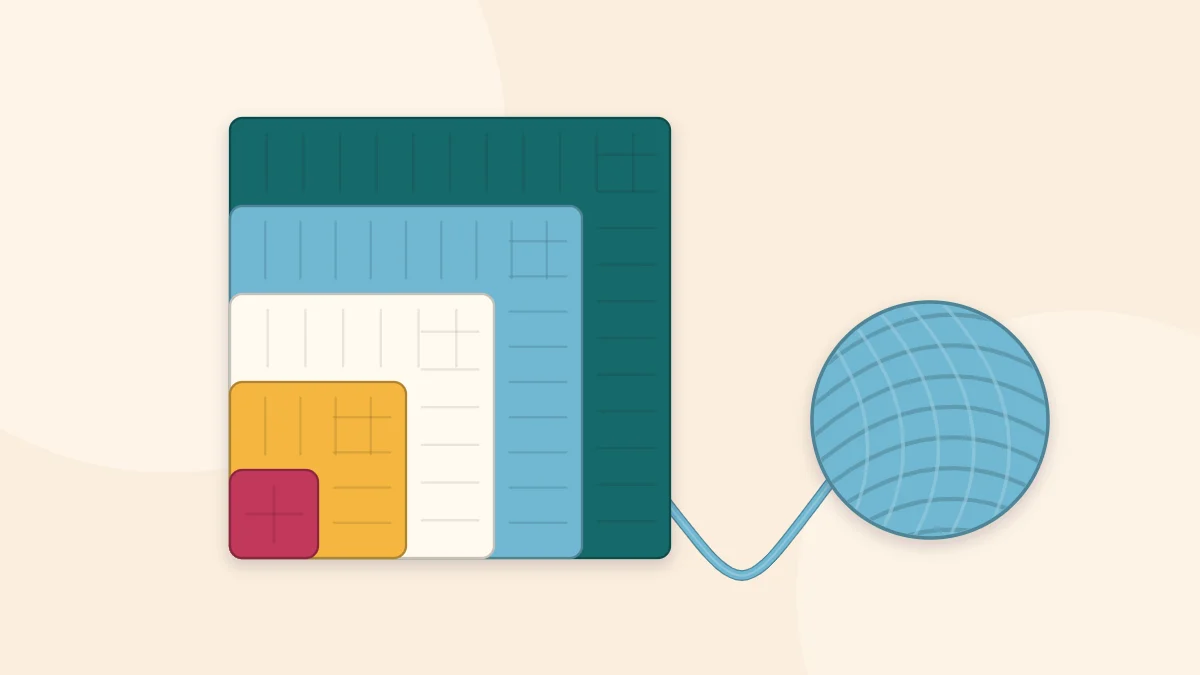
A mitered granny square starts in one corner instead of the center. You work back and forth in rows, and every row bends around a single corner, so the stripes come out as nested L shapes. The stitches are the same 3-double-crochet clusters used in a classic square. Only the direction of travel changes, which makes this a good second pattern once the basic square feels comfortable.
How a Mitered Square Differs From a Classic One
A classic granny square grows outward from a center ring, with four corners in every round. A mitered square has one working corner. Each row runs up one side, turns the corner with a chain-2 space, and runs along the second side. The starting ring ends up in one corner of the finished piece, and the last row forms the two opposite edges.
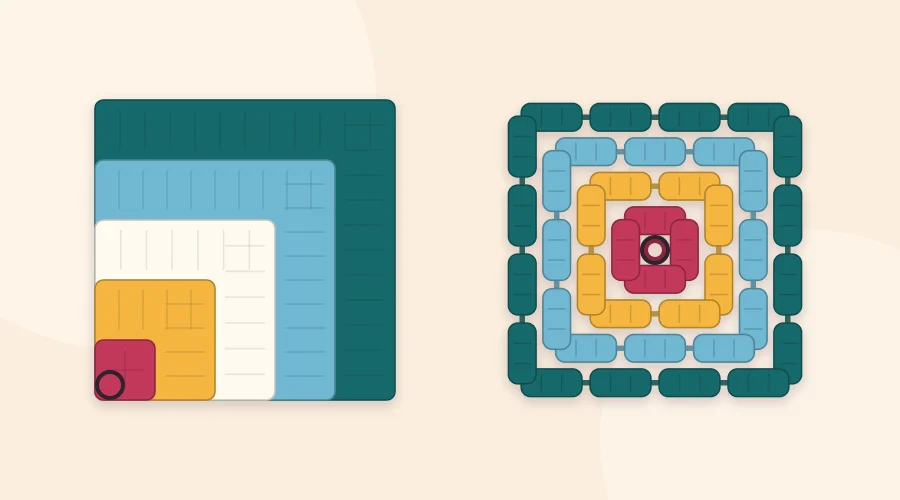
Because the work is turned after every row, both faces of the fabric look alike, and the square has no slip-stitch joins at all.
Materials
- Worsted weight (4) yarn in two or more colors. Smooth acrylic or cotton shows the stripes clearly.
- Crochet hook US H-8 (5 mm), or the size that gives a fabric you like with your yarn.
- Yarn needle and scissors.
An eight-row square in this yarn and hook will probably land somewhere around 5 to 6 in (13 to 15 cm) across, but that figure is an estimate. Tension, fiber and hook all move it, so make one square and measure it before planning a project around a number.
Abbreviations
This pattern uses US crochet terms. A US double crochet is the same stitch as a UK treble.
| Abbreviation | Meaning |
|---|---|
| ch | chain |
| sl st | slip stitch |
| sc | single crochet |
| dc | double crochet |
| st(s) | stitch(es) |
| sp | space |
| ch-2 sp | the space made by 2 chains (the corner) |
| rep | repeat |
A cluster here simply means 3 dc worked into the same stitch or space. The turning chain is the ch 3 at the start of each row; it counts as the first dc of that row.
Mitered Granny Square Pattern
Ch 4 and join with a sl st in the first ch to form a ring.
- Row 1: Ch 3 (counts as dc here and in every row), 2 dc in the ring, ch 2, 3 dc in the ring. Turn. (6 dc, 1 ch-2 sp; 1 cluster on each side)
- Row 2: Ch 3, 2 dc in the same st at the base of the chain (first cluster made). Work (3 dc, ch 2, 3 dc) in the ch-2 sp. Work 3 dc in the top of the turning chain from Row 1. Turn. (12 dc, 1 ch-2 sp; 2 clusters on each side)
- Row 3: Ch 3, 2 dc in the same st. Work 3 dc in the sp between the next two clusters. Work (3 dc, ch 2, 3 dc) in the ch-2 sp. Work 3 dc in the sp between the next two clusters. Work 3 dc in the top of the turning chain. Turn. (18 dc, 1 ch-2 sp; 3 clusters on each side)
- Row 4 and every later row: Ch 3, 2 dc in the same st. Work 3 dc in each sp between clusters up to the corner. Work (3 dc, ch 2, 3 dc) in the ch-2 sp. Work 3 dc in each sp between clusters along the second side. Work 3 dc in the top of the turning chain. Turn.
Rep Row 4 until the square is the size you want, then fasten off. Each row adds one cluster to each side, which is 6 more dc in total.
| Row | Clusters per Side | Total dc |
|---|---|---|
| 1 | 1 | 6 |
| 2 | 2 | 12 |
| 3 | 3 | 18 |
| 4 | 4 | 24 |
| 5 | 5 | 30 |
| 6 | 6 | 36 |
| 7 | 7 | 42 |
| 8 | 8 | 48 |
The check is easy: the number of clusters on one side always equals the row number. If Row 5 has four clusters on one side, the edge cluster at the start or end of the row was missed.
Watch out
The last cluster of each row goes into the top of the turning chain, not into a space. That chain tends to hide against the neighboring stitch, and skipping it makes one side shorter with every row.
Planning the Stripes
The L shapes only show when the color changes, so stripe planning is most of the design. Three simple schemes work well:
- Two-row stripes. After two rows the yarn is back at the edge where it started, so every color change happens on the same side of the square. Tails are grouped along one edge and are easier to hide.
- One-row stripes. Thinner lines and a busier look, with color changes alternating between the two edges.
- Solid corner, striped edge. Work four or five rows in one color, then finish with single rows of contrast for a framed effect.
To switch, finish the last dc of a row with the new color in the final yarn over, or fasten off and join the new yarn in the first stitch of the next row. Both methods are explained step by step in the guide to changing colors in a granny square.
Tip
Make every square in a set with the same number of rows and the same stripe order, then rotate them when you lay them out. Four squares with their starting corners touching form a diamond of nested frames.
Finishing the Edges
A mitered square has two kinds of edge. Two sides are the tops of the final row, and the other two are the stacked ends of the turning chains and edge clusters. They look slightly different and can stretch differently, so a single evening-out round helps before joining.
Join yarn in any corner and work sc around the whole square: 1 sc in each dc along the two top sides, 3 sc in each corner, and roughly 3 sc for each row end along the two side edges. That row-end figure is a starting point, not a rule. If the edge ripples, use fewer; if it pulls in, use more. The article on adding a granny square border covers corner counts in more detail.
Corner-start squares often sit a little off-square straight off the hook. Pinning them to matching measurements while damp usually settles that; see how to block granny squares for the method that suits your fiber.
Other Geometric Looks
The mitered square is one member of a wider family of squares that rely on straight lines and color blocks instead of rounds.
- Half-and-half squares. A solid square worked in the round, with the color changed at two opposite corners in every round, splits into two triangles along the diagonal.
- Diagonal color blocks. A square worked from one corner to the opposite corner in diagonal rows gives slanted stripes instead of L shapes.
- Mitered layouts. The same mitered square makes different patterns depending on rotation: starting corners together for diamonds, all pointing the same way for stepped diagonals, or alternating for zigzags.
Frequently asked questions
Is a mitered granny square harder than a classic granny square?
No. It uses the same 3-double-crochet clusters and one chain-2 corner. The only new habits are turning after every row and working the last cluster into the top of the turning chain.
Why is one side of my mitered square shorter than the other?
The edge cluster on that side has usually been skipped. Each row should begin with a cluster in the first stitch and end with a cluster in the top of the turning chain, so the cluster count on each side equals the row number.
Can mitered squares be joined with classic granny squares?
Yes, as long as the finished measurements match. Work an evening-out round of single crochet on the mitered squares and block both types to the same size before joining.