Granny Square Blanket: How to Plan, Join and Finish One
How to plan a granny square blanket from the finished size backward: choosing a square size, counting squares, placing colors, joining and adding a border.

Tutorial at a glance
Materials
- Yarn needle
- Scissors
- Measuring tape
- Blocking mat and pins
- Stitch markers or paper slips for labeling rows
- Kitchen scale (optional)
A granny square blanket is planned backward. Decide the finished size first, measure one real square, and let those two numbers tell you how many squares to make. Everything else, including layout, joining and the border, goes more smoothly when that arithmetic is settled before the second square is started.
Step 1: Pick a Blanket Size and a Square Size
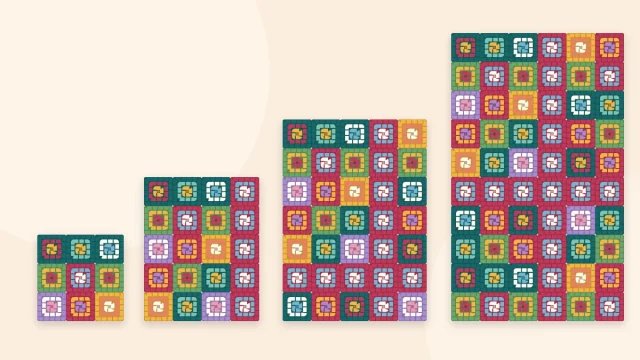
Blanket dimensions are flexible, but a target keeps the project from drifting. Common goals are about 30 by 36 in (76 by 91 cm) for a baby blanket and about 50 by 60 in (127 by 152 cm) for a throw. Larger bed sizes, and the number of squares each needs, are laid out in the granny square blanket sizes chart.
Square size is a trade between speed and detail:
| Square Size | What It Means for the Blanket |
|---|---|
| Small, about 4 in (10 cm) | Many squares, many seams and ends, fine mosaic look, good for scraps |
| Medium, about 5 to 6 in (13 to 15 cm) | A balanced amount of crochet and joining; the usual choice for a first blanket |
| Large, about 8 in (20 cm) or more | Few squares, fast assembly, bold blocks of color, fewer seams to stiffen the fabric |
Step 2: Make a Sample Square and Do the Math
Crochet one square in the yarn, hook and round count you intend to use. Pin it out or block it the way you will treat the finished squares, then measure across the middle from side to side.
- Squares across = blanket width divided by square width, rounded to a whole number.
- Squares down = blanket length divided by square width, rounded to a whole number.
- Total squares = squares across multiplied by squares down.
For example, a 5 in (13 cm) square and a 50 by 60 in (127 by 152 cm) throw gives 10 squares across and 12 down, which is 120 squares. A planned border adds width on every side, so subtract twice the border depth from each dimension first if the final size matters.
Tip
Weigh the sample square on a kitchen scale and multiply by the total number of squares. Compare that figure with the weight printed on the yarn label to estimate how many skeins to buy, then add a margin for joining and the border.
Step 3: Plan the Colors
Color placement decides whether a blanket looks planned or accidental. Both can be lovely, but each takes a different approach.
- One unifying color. Work the final round of every square in the same color. The inner rounds can be anything, and the shared outline ties them together.
- Checkerboard. Make two colorways and alternate them, so no square touches another of the same kind along an edge.
- Diagonal stripes. Shift the color order by one square in each row to send bands of color across the blanket at an angle.
- Gradient. Arrange squares from light to dark across the width or from the center outward.
- Scrappy. Use leftovers at random, keeping yarn weight and fiber consistent so every square behaves the same way.
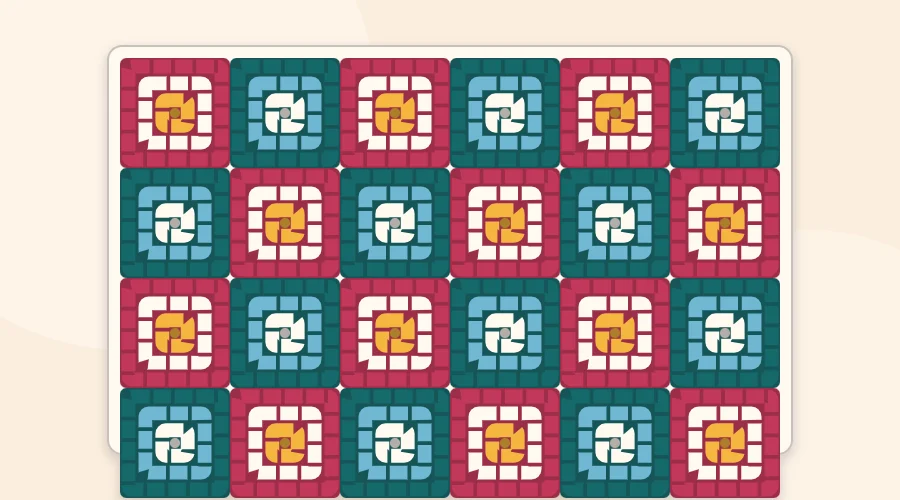
For a checkerboard with an even total, make half the squares in each colorway. With an odd total, such as 7 by 9, one colorway needs one extra square, and that colorway will sit in all four corners.
Step 4: Make and Finish the Squares
Consistency matters more than speed here. Use the same hook throughout, since two hooks marked with the same size can still give slightly different fabric. Count rounds on each square, and compare every tenth square against the sample to catch tension drift early.
Weave in the tails on each square as it is finished, or at least at the end of each session. A throw of 120 three-color squares has hundreds of ends, and they are far easier to handle a few at a time. Then block the squares to one measurement so the edges line up when joined. Squares that match in size before joining produce flat seams; squares that are forced to fit produce puckers.
Step 5: Lay Out the Blanket
Arrange all the squares on a bed or a clean floor before joining anything. Step back, or look at the layout through a phone camera, which makes clumps of one color easier to spot. Check three things:
- No two identical squares touch unless the design calls for it.
- Strong or dark colors are spread across the whole blanket and not gathered in one area.
- Every square faces the same way up, with right sides showing.
When the layout is right, stack each row in order from left to right and mark the stacks with numbered slips of paper or stitch markers so the order survives being moved.
Step 6: Join the Squares
There are two routes. In the first, finished squares are sewn or crocheted together afterward with a whip stitch, a slip stitch seam or a single crochet ridge. The methods and their effect on the look of the blanket are compared in how to join granny squares. In the second, each square is attached to its neighbors while its last round is being worked, which is covered in join as you go granny squares.
For separate seaming, an efficient order is:
- Join the squares of each row into a strip, working all the short vertical seams.
- Join the strips with long horizontal seams that run the full width of the blanket.
- Where four corners meet, keep the same tension as elsewhere and make sure each corner is caught, so no hole opens at the intersection.
Watch out
Seams worked too tightly make the blanket pull in along every join. Use the same hook as the squares, or one size larger, and stretch the seam gently every few inches to check that it gives as much as the fabric around it.
Step 7: Add a Border
A border hides small differences at the outer edge and gives the blanket weight. Begin with one plain round that treats the whole blanket as a single large square, working evenly across each square and each seam, with extra stitches in the four outer corners. After that, any number of rounds can follow. Stitch counts for corners and several edging styles are in the granny square border guide.
The Whole Order of Work
- Choose the blanket size and a rough square size.
- Make, block and measure one sample square.
- Calculate the grid and the total number of squares.
- Estimate yarn from the sample’s weight and plan the colors.
- Crochet all the squares, weaving in ends as you go.
- Block the squares to one size.
- Lay out, then stack the rows in order.
- Join rows into strips, then strips into the blanket.
- Work the border and weave in the last ends.
Follow the care instructions on the yarn label for the first wash. If the blanket combines several yarns, treat it as gently as the most delicate one requires.
Frequently asked questions
How many granny squares do I need for a blanket?
Divide the blanket width and length by the measured width of one square, round each to a whole number, and multiply the two. A 50 by 60 inch throw made of 5 inch squares needs 10 by 12, or 120 squares.
Should I join the squares as I go or at the end?
Joining at the end lets you rearrange the layout freely and block every square first. Joining as you go saves seaming time but fixes each square's position as soon as it is attached.
What is the best square size for a first blanket?
A medium square of about 5 to 6 inches is a comfortable middle ground: quick enough to finish, with a manageable number of seams and ends.
Do I need to block squares before joining them?
It is not compulsory, but squares brought to the same measurement are much easier to join and give flatter seams.