Granny Square Cardigan: How to Plan and Size Your Own
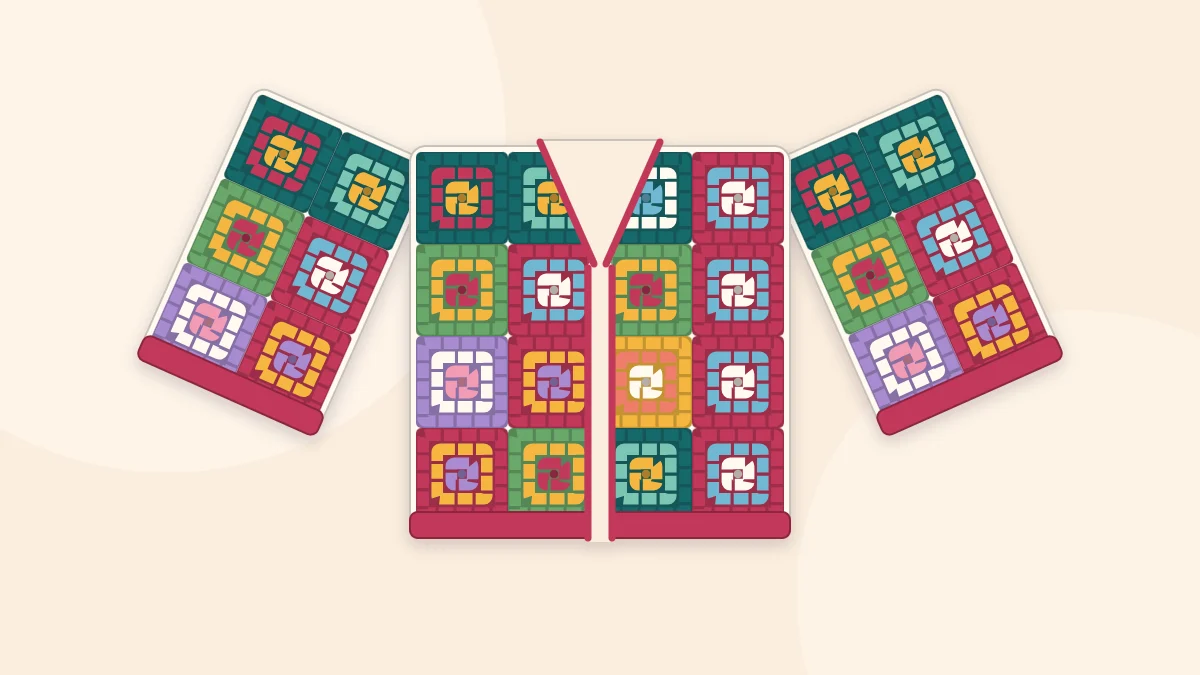
A granny square cardigan is five rectangles of joined squares. This planning guide explains the construction, the sizing arithmetic and the yarn choices that give the fabric drape.
Tutorial at a glance
Materials
- Yarn needle
- Scissors
- Tape measure
- Blocking mat and rustproof pins
- Locking stitch markers or clips for holding seams
A granny square cardigan is five flat rectangles of joined squares: one back panel, two front panels and two sleeves. There is no shaping at all. The fit comes from two decisions only, how big each square is and how many squares go into each rectangle, so the planning happens with a tape measure and a sketch before the first chain. This is a planning guide, not a fixed sized pattern.
How the Five Pieces Fit Together
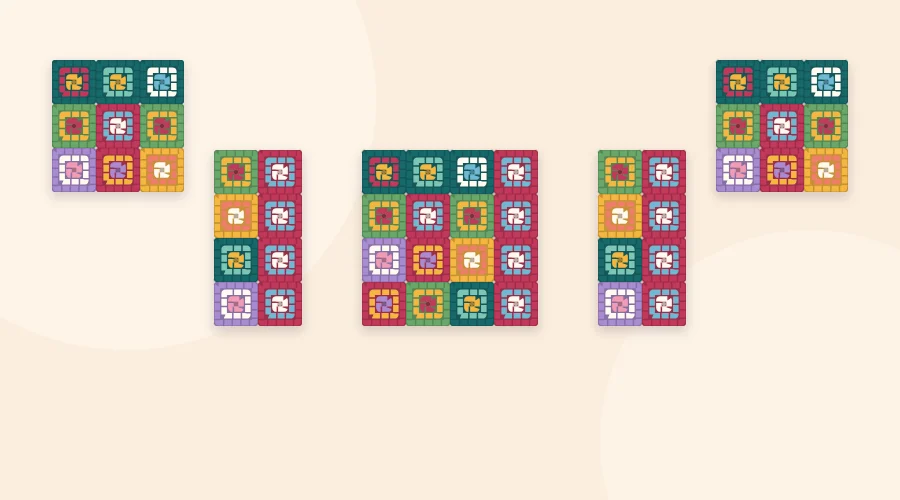
- Back: the widest rectangle. Its width sets the fit of the whole garment.
- Fronts: two narrow rectangles as tall as the back. Together they are narrower than the back, which leaves the front open.
- Sleeves: two rectangles, each folded lengthwise and seamed into a tube.
The shoulders are joined straight across, the sides are joined from the hem up to the armhole, and the top of each sleeve tube is sewn into the armhole opening. Because the shoulder line is straight and usually wider than the body, the sleeve seam sits partway down the upper arm. That dropped shoulder is what gives the style its relaxed, boxy look.
A Worked Example With 4-Inch Squares
The numbers below assume squares that measure 4 in (10 cm) after blocking. They illustrate the method and are not a fitted size.
| Piece | Squares Wide by Tall | Squares | Approximate Size |
|---|---|---|---|
| Back | 6 by 5 | 30 | 24 by 20 in (61 by 51 cm) |
| Left front | 2 by 5 | 10 | 8 by 20 in (20 by 51 cm) |
| Right front | 2 by 5 | 10 | 8 by 20 in (20 by 51 cm) |
| Sleeves (2) | 4 around by 4 long | 16 each, 32 for the pair | 16 in (41 cm) around, 16 in (41 cm) long |
That is 30 + 10 + 10 + 32 = 82 squares. The pieces line up like this:
- Shoulders: each front is 2 squares wide and joins to the outer 2 squares of the back. The middle 2 squares of the back, about 8 in (20 cm), stay open as the back neck.
- Sides: the bottom 3 squares of each side are joined. The top 2 squares are left open, giving an armhole 8 in (20 cm) deep on the front and 8 in (20 cm) on the back.
- Sleeves: the sleeve is 4 squares around, 16 in (41 cm), which matches the 16 in (41 cm) armhole edge exactly, square for square.
The body measures 24 + 8 + 8 = 40 in (102 cm) of fabric around, with an 8 in (20 cm) gap between the front edges. It is meant to hang open; a front band narrows the gap a little.
Sizing by Square Size and Count
Start with the back. Measure a loose cardigan or sweater that fits well, laid flat, from side seam to side seam, and aim for a back panel close to that width. Granny square cardigans are usually worn with several inches of ease, so a generous number is fine. Then find a combination of square size and square count that lands on it.
| Square Size | 4 Squares Wide | 5 Squares Wide | 6 Squares Wide |
|---|---|---|---|
| 4 in (10 cm) | 16 in (41 cm) | 20 in (51 cm) | 24 in (61 cm) |
| 5 in (12.5 cm) | 20 in (51 cm) | 25 in (63.5 cm) | 30 in (76 cm) |
| 6 in (15 cm) | 24 in (61 cm) | 30 in (76 cm) | 36 in (91 cm) |
Small squares give finer control because each one added or removed changes the width by less. Large squares mean fewer squares and fewer seams but bigger jumps between sizes. With 5 in (12.5 cm) squares, for example, a back of 5 by 4 squares (20 squares), two fronts of 2 by 4 (16 squares) and two sleeves of 4 around by 3 long (24 squares) comes to 60 squares, with a 25 in (63.5 cm) back and a wide 20 in (51 cm) sleeve.
Three rules keep any version consistent:
- The fronts are the same height as the back.
- The sleeve has an even number of squares around, and the armhole is half that number deep.
- The back neck is the back width minus both front widths, in whole squares.
The granny square size guide explains how rounds, yarn and hook change the size of a square, and how to nudge one that is slightly off.
Watch out
A cardigan magnifies small differences. A square that is 0.25 in (6 mm) too large, repeated across a 6-square back, adds 1.5 in (4 cm) to the width. Block and measure the first square before making the rest.
Yarn, Hook and Drape
A garment needs fabric that moves, which is the opposite of what suits a bag or a basket. Stiff squares make a cardigan that stands away from the body like a box.
- Weight: DK weight (3) or a light worsted weight (4) keeps the finished piece from becoming heavy. Dozens of squares add up quickly.
- Fiber: wool and wool blends are springy and recover after stretching. Cotton drapes well but is heavier and tends to lengthen under its own weight, so a cotton cardigan may be planned a little shorter. Acrylic is light and easy to care for.
- Hook: choosing a hook toward the larger end of the range suggested on the yarn label, for example a US H-8 (5 mm) hook with DK yarn, loosens the stitches and softens the fabric.
More detail on fibers is in the guide to the best yarn for granny squares.
Order of Work
- Make one square, block it and measure it. Adjust the hook or the number of rounds until it matches the planned size.
- Make all the squares and block them to the same measurement.
- Join the squares into the five panels. A flat join keeps seams from adding bulk; the options are compared in how to join granny squares.
- Join the shoulders, then the sides, leaving the armholes open.
- Seam each sleeve into a tube and sew it into its armhole, matching square to square.
- Try it on before adding any edging. Length is easy to change at this point by adding a row of squares to the hem or the cuffs.
- Finish the edges.
Bands, Cuffs and Hem
An edging hides the stepped look where squares meet and steadies the openings. Standard US terms apply here: sc means single crochet (UK double crochet) and dc means double crochet (UK treble). A few rounds of sc worked up one front, around the back neck and down the other front make a simple band. One or two rounds of sc around each cuff and the hem stop those edges from flaring. For a looser finish, a round of dc clusters matches the squares themselves.
Frequently asked questions
How many granny squares does a cardigan need?
It depends on the square size and the fit. The worked example in this guide uses 82 squares of 4 in (10 cm): 30 for the back, 10 for each front and 16 for each sleeve.
What size should the squares be for a cardigan?
Squares of 4 to 6 in (10 to 15 cm) are practical. Smaller squares allow finer size adjustments, while larger squares mean fewer pieces and fewer seams.
What is the best yarn for a granny square cardigan?
A DK or light worsted yarn with some drape, such as a wool blend or soft acrylic, keeps the garment from being stiff or heavy. Cotton drapes well but is heavier and can lengthen with wear.
Is a granny square cardigan hard to make?
The squares are beginner friendly and there is no shaping, but planning the size, blocking every square to match and seaming the pieces take care, so it suits someone who has already finished a few granny square projects.